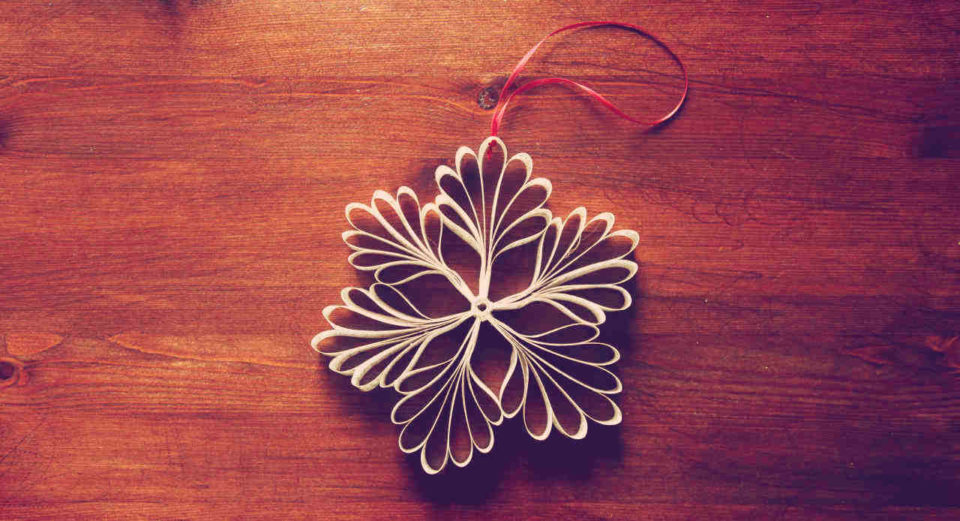
Craft snowflakes without folding and cutting: With this quick guide you can easily make beautiful winter decoration out of music paper. This is how to make snowflakes from paper.
Snowflakes as Christmas decoration are one of my favourite motifs! The white flakes stand out beautifully on the windows – it already starts to get dark in the afternoon and little snowflakes also decorate my Christmas tree.
In the run-up to Christmas this year, I tried out a new technique how to make snowflakes from paper. To do this, you use strips of paper of different lengths. A hot glue gun is an indispensable tool to make the snowflakes stick. You don’t really need much else to make the snowflakes – everything I used is on the material list.
I decided to use music paper because I think it goes well with the Christmas season. But an old book is just as suitable!
Material List*
- Note paper e.g. the Christmas Oratorio
- Hot glue gun
- Paper clips
- Scissors
- Turret punch pliers
- Dark red satin ribbon, 6 mm
- Pencil
- Triangle
- If necessary, craft mat or pad
How to Make Snowflakes From Paper

1. Measure and Cut Strips of Paper

The whole snowflake consists of 2.5 cm wide paper strips. Draw the paper strips on one side and then cut out 6 sides at a time.
- The 1st strip is the entire broadside of the music book long and 2.5 cm wide.
- The 2nd and 3rd strips are 1.25 cm shorter.
- The 4th and 5th strip is 2.5 cm shorter.
- The 6th and 7th sides are 5 cm shorter than the total length of the 1st strip.
- Cut 2 more strips in total length for the middle piece of the snowflake.
2. Make the Arms of the Snowflake

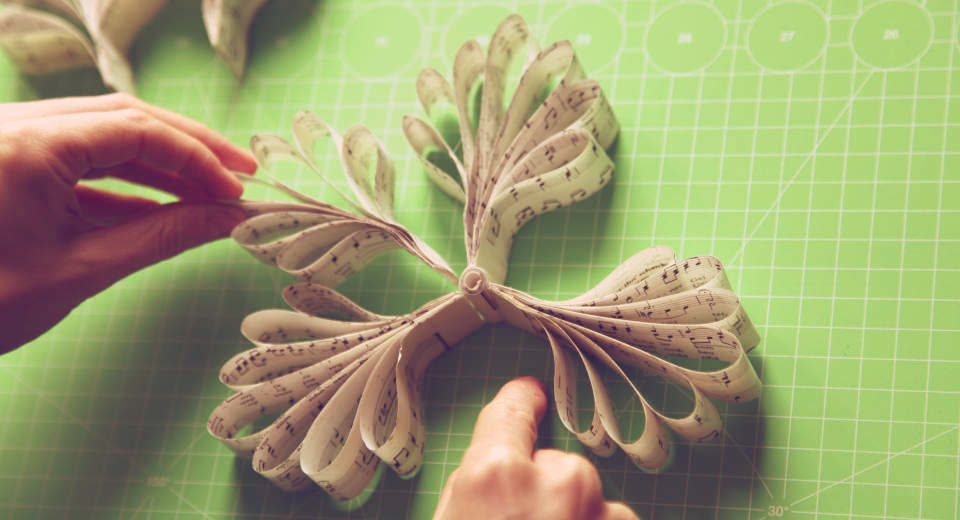
Now bend the longest strip into a loop and hold it, then the 2nd and 3rd right and left, the 4th and 5th until you have a palmette with seven loops. Make sure the strips are directly on top of each other at the bottom and pin them 2 cm above the edge with a paper clip.
Repeat with the other 5 arms of the snowflake.
3. Glue the Snowflake Together

Put the two strips for the middle piece on top of each other, roll them up and glue them together.
Now glue each layer of paper of the arms of the snowflake to each other with hot glue. The complete lower end of the arm should be glued well, as this will make the snowflake stable. Finally, glue the arm generously to the rolled up middle piece with hot glue and press it on until the hot glue has dried.

Repeat this with the remaining 5 arms of the snowflake.
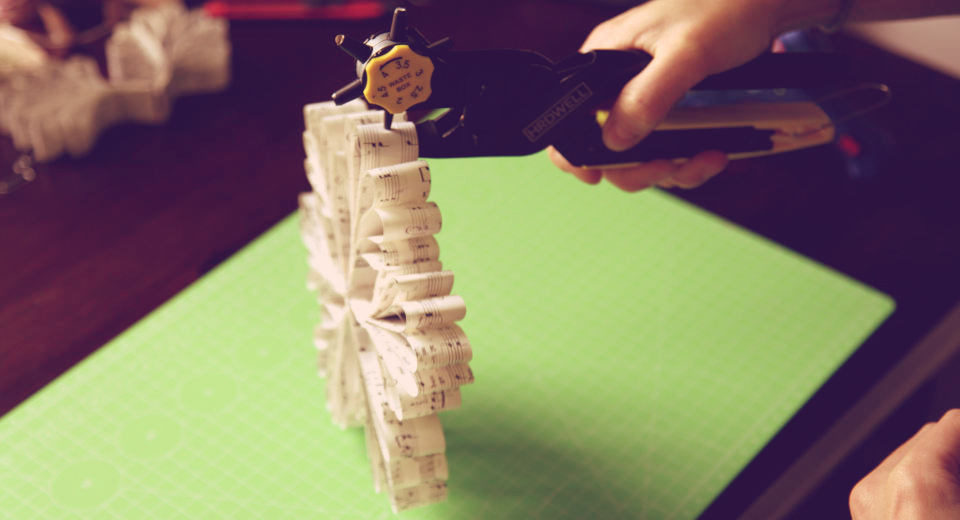
Finally, punch a small hole in the centre of one palmette with a revolving punch, thread the satin ribbon through twice and knot it inside.
I used a traditional sheet music book of Christmas carols and my snowflakes are 20cm in diameter.
Discover even more beautiful crafting ideas, for example instructions for diy Christmas gift tags and clothes peg stars! Greatime has inspiration for personal gifts and lots of tips for activities with kids, friends and your partner!
If you like our page, we’d love your Like on Facebook and Instagram. 😉
*There are affiliate links in this article. This means that if you buy a product via such a link, Greatime may receive a small commission without the product becoming more expensive.


![Uber En Quot Sealing An Envelope Quot De Quot Briefumschlag Versiegeln Quot [Uber En="Make*an*envelope*and*seal*it*with*a*seal*and*wax." De="Briefumschlag*basteln*und*gestalten*sowie*am*Schluß*mit*Siegel*und*Wachs*verschließen"]](https://greatime.de/wp-content/uploads/2020/07/briefumschlag-basteln-gestalten-siegelwachs.jpg)
![Uber En Quot Christmas Sports Games Snowball Fight Quot De Quot Weihnachtssportspiele Schneeballschlacht Quot [Uber En="Snowball*fight*-*timeless*classic*Christmas*sports*game" De="Schneeballschlacht*–*Zeitloser*Klassiker*der*Weihnachtssportspiele"]](https://greatime.de/wp-content/uploads/2024/11/weihnachtssportspiele-schneeballschlacht.jpg)
![Uber En Quot Pompom Sheep Quot De Quot Pompon Schaf Quot [Uber En="With*this*how*to*make*a*pompom*sheep*you*can*make*a*super*Easter*decoration*yourself" De="Ein*Pompon-Schaf*ist*eine*super*Osterdeko*zum*selber*machen"]](https://greatime.de/wp-content/uploads/2016/03/pompon-schaf-osterlamm-3.jpg)